F3 Shovel Flags
Use this documentation to make your own shovel flag.
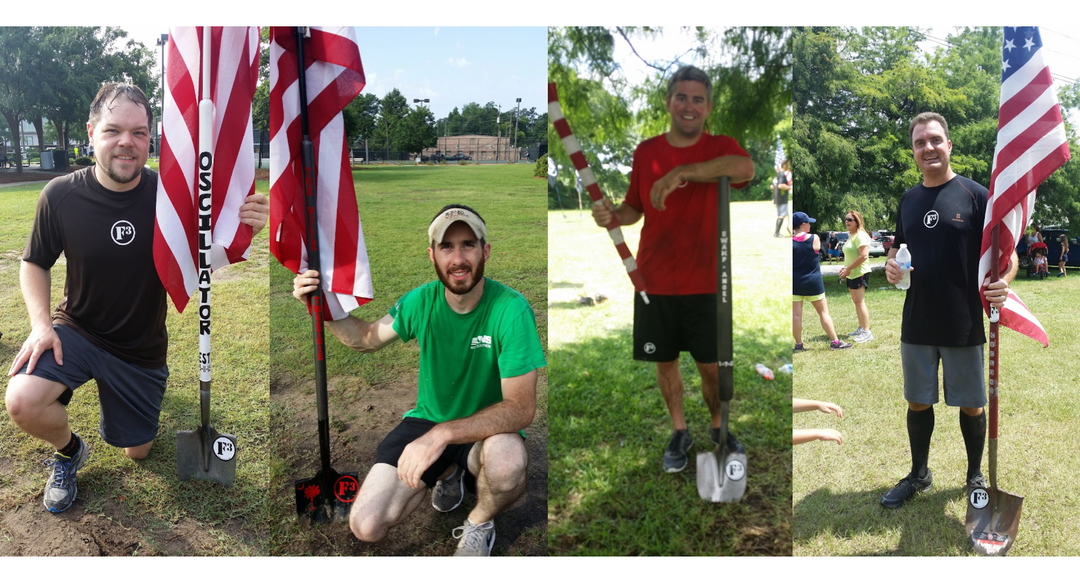
Shovel Flags
By: Pepe
I'm by no means a carpentry expert, though I have made quite a few things over the years. I got into Shovel Flags kind of by accident. I was EH'ed into my first post by my brother Epee from Swamp Rabbit. In between bouts of merlot I fell in love with the concept of the shovelflag. I mean, It's pretty distictive in design. Making it so that any place can be marked as F3 territory for the duration of the post. I also saw several color and construction types. Even Epee had his own made from a poly shovel. They were personal. They had *Style*, even the one flag pole duct-taped to a shovel. To me that duct-tape said, "I don't really know how to do this, but Dammit *I'm going to Try*." I liked the attitude it represented.
Fast forward ~5 months and the launch of F3 Summerville.
I posted the first week, and promptly found out how out-of-shape I was. I also noticed that we had no Flag. So I made my first, and presented it to the group just as the "Official" one to show up. It had taken a little extra time to complete due to weather. So I stripped mine and used it to make our running group's Shovelflag: Tremor. I'd learned a bit making the first one and this was much closer to my expectation. The third I made was "Aftershock". Isn't she pretty? And she doesn't even have her final coat of shellac on. By the time I got to make Seismic I was getting the hang of things, and started to show the style that I liked in the initial flags I saw. Even if they are just in Black and White.
Why this Intro? I want to encorage you to go try. Fail/succeed/whatever. Go do it, and be proud of it. Maybe your duct-tape & Pole peice of engineering will inspire someone else to try harder too. It did me. Get better.
~ Pepe

Construction
Step 1: Watch Raider's How-To Videos
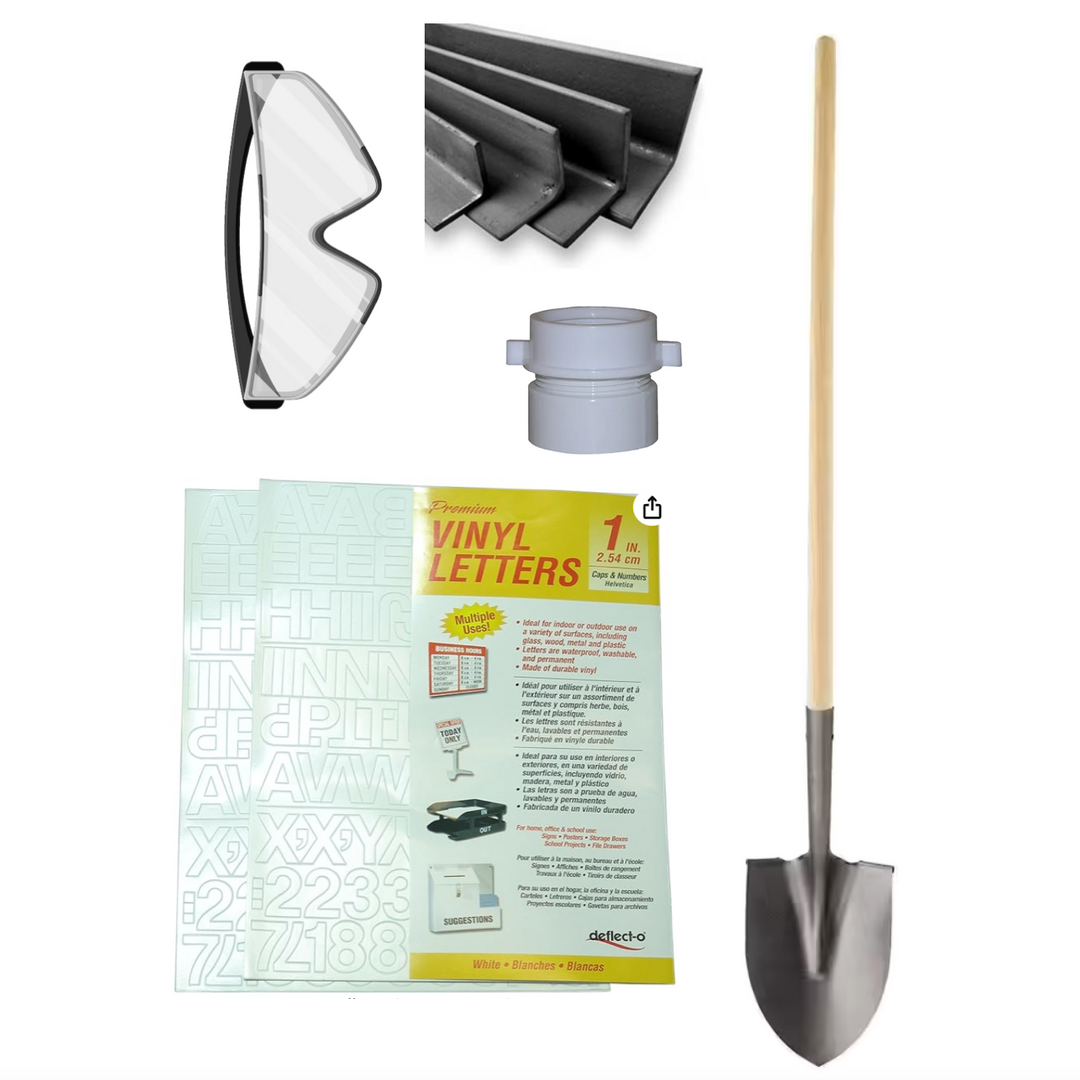
Step 2: Buying the Materials
- Safety Glasses if you don't own a pair. Lets be safe.
- $6 One Eagle Long-Handle wood shovel (check to be sure it's true)
- $11 One flag set (Item #: 83953 | Model #: 10765) Don't wait till the last min. to buy this piece, it's a slow moving stock: once they're out it'll take a while to get more.
- $6 One package clear gel epoxy. (I prefer the one with the mixing tip. One package is good for two shovels.)
- $10 One 3' x 3/4" Steel angle iron (Item #: 44168 | Model #: 117000) (Returnable afterwards if you don't mess it up. Just need it to hold the shaft steady while the epoxy sets.)
- 2x 1.5" PVC pipe drain adapters.
- Shims
- Deflect-O Premium 1-Inch Vinyl Letters And Numbers - Helvetica (I get mine from Amazon)
Step 3: Assemble the Jig
Per the video.
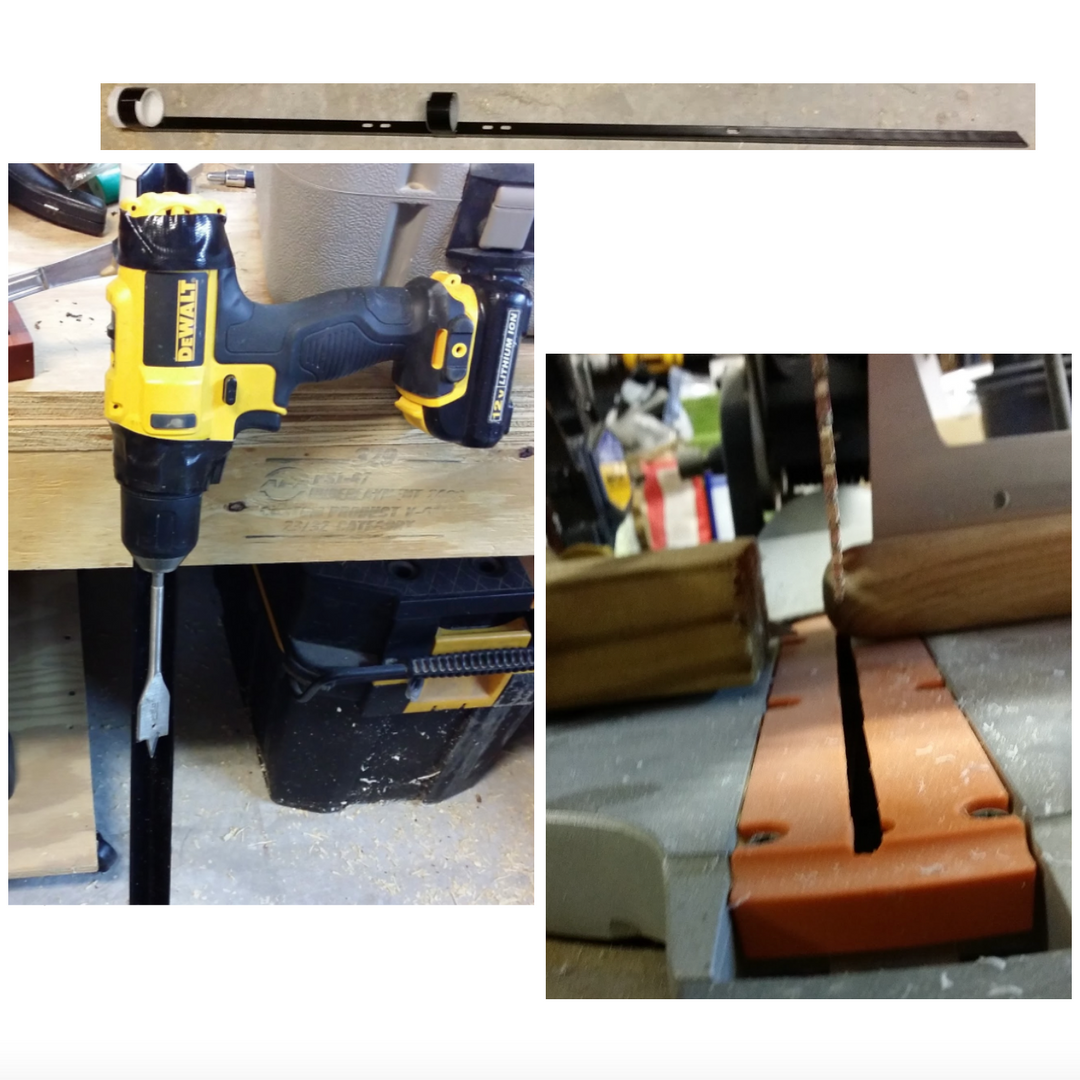
Step 4: Nip the tip
Cut off the tip of the shovel's handle, as seen below. Try to leave a bit of the rounded end as it'll look better with the taper and it'll make finding the center easier.
Note that I'm using a miter saw here. This can also be done with a hand miter saw or other hand saw, but it's harder. For those types of saws I'd recommend using what I call the hole method. Drill a 1/2" hole about 1/4" deep into a peice of scrap wood so that when both the shovel and the scrap wood are touching the rounded end of the handle is sitting in the hole of the scrap wood. you can then keep a bit of pressure (get a friend) between the two and use the scrap peice of wood as a guide to keep the hand saw square & straight through the cut.
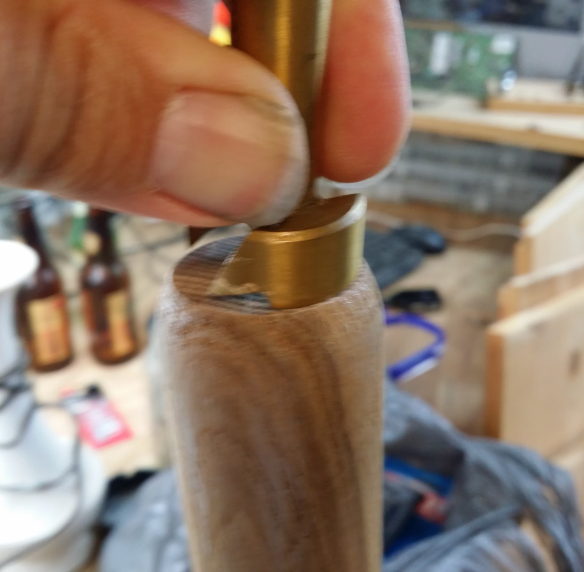
Step 5: Drill the Hole
I find the center using a forstner bit. The circle makes it easy check all sides for equal buffers.
If you don't have a forstner set you can use the paper method described in Tip #9 on the tip tab.
Don't drill a pilot hole, as tempting as that may be.
I use a 7/8" forstner bit to start the hole, maybe a full 16th' deep. This cuts the end fibers and makes chipping less likely. It also gives a good starting hole.
Use a 13/16" paddle bit to drill the holes. I like a paddle bit as they're cheap, sharpenable, and don't require a corded drill. (The auger bit WILL require lots of power).
I use the 13/16" to create a slightly oversized hole. The Epoxy with fill the gaps easily and this'll allow you to get a good straight mount. The "Big Danger" of using a 3/4" bit EXACTLY, is that you risk cracking the handle of the shovel while trying to true it up later. This wood is HARD and doesn't like to give, so drill big and fill.
The thing is that the jig isn't going to hold everything perfectly straight like a drill press.
I hold the shovel with a low mounted wood vice, I'd definitely recommend getting help on this stage. Get someone to hold the shovel while you operate the drill.
The Jig is just there to help act as a guide during the first inch or so that you're drilling. After that just keep the shaft of the paddlebit in the center of the opening and it'll be fine.
Drill to 2.5-3" deep.
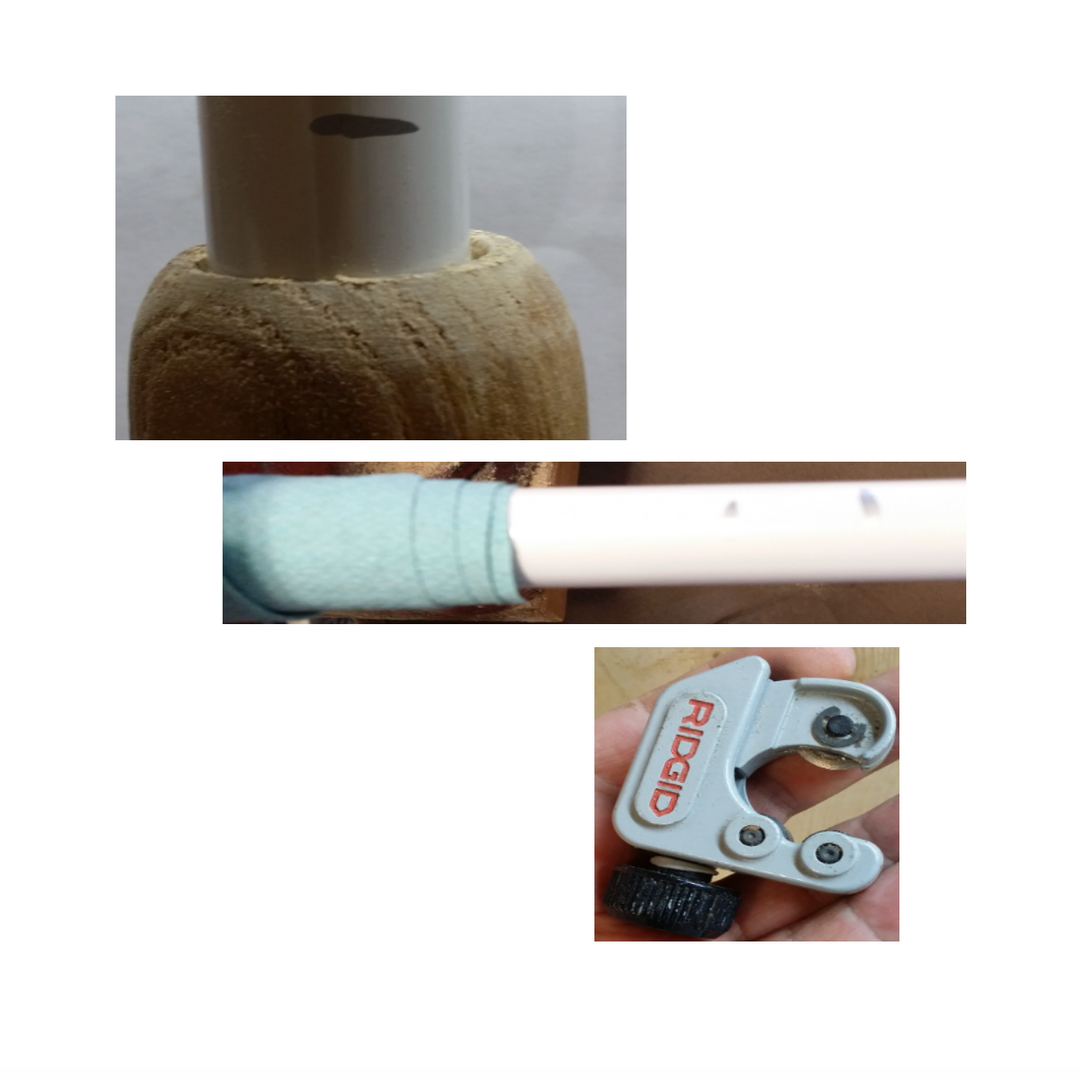
Step 6: Cutting the pipe
There's no standard way to do this. I like to put the end of one of the pipes that comes with the flag kit into the hole we just drilled and then mark off half an inch or so above that.
Just be sure that this is one of the END POLE's END. Don't make the narrow section your insert piece.
I then wrap a cloth wipe around the pipe and cinch it into my vice. I then cut it with a sawsall. A hacksaw works just as good though be careful of the sharp edges.
I recommend buying a tubing cutter rather than a hacksaw though, they're not expensive and lets you get many peices out of the same length of tubing. Plus they're just plum safer.
Video: How to use a piper cutter?
Step 7: Sanding
This step was skipped in the videos. Sanding has the advantage of leveling out the wood so there are less voids present when lettering, which will make everything crisper.
Rough sand with a fairly aggressive sand paper. ~P80 the whole handle. We need to remove the clearcoat and get down to the wood. Don't neglect down around the base of the shovel.
Move down to a semi-finish grit (~P120)
Wherever there will be lettering sand down to P220. Wet the surface slightly with a damp cloth. Let dry, then resand with the P220.
DON'T SKIP THIS STEP! Sanding well is one of those things that'll make the paint job look like a pro.
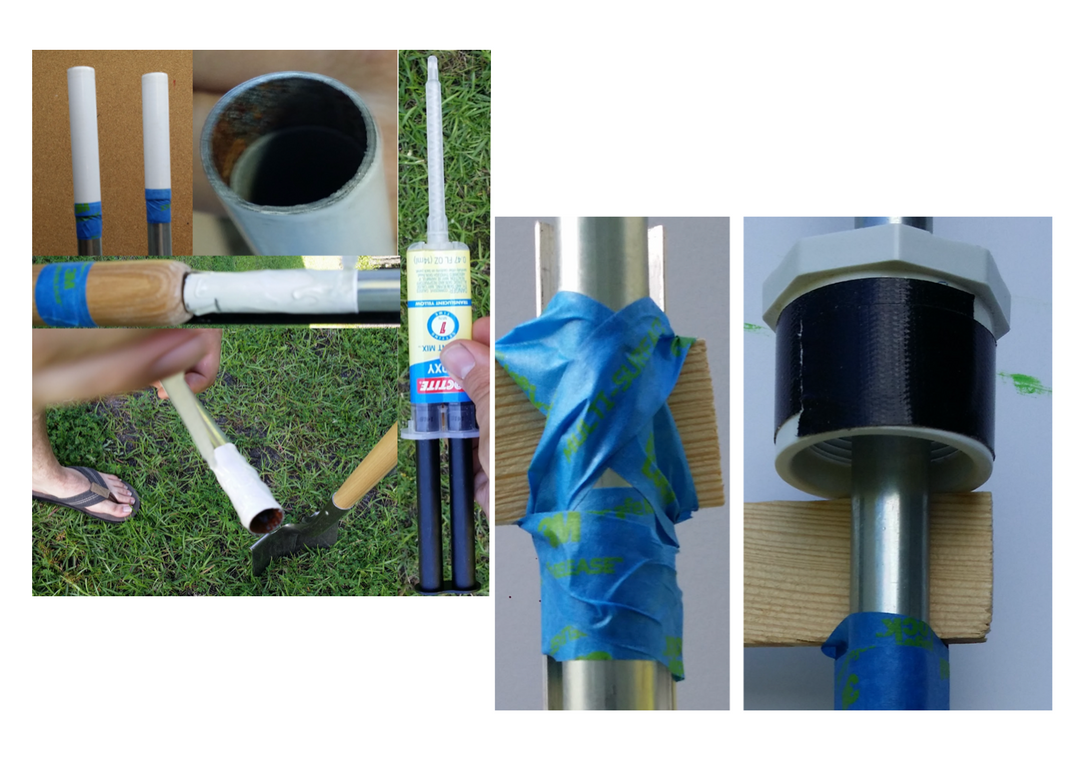
Step 8: Epoxy Time!
Disassemble your jig.
Tape ~16" of the angle Iron to the handle of your shovel. Use masking tape near the top of the handle, and near the end of the iron. This'll establish a great straight edge.
Dry fit your cut pipe into the hole, cut side in.
* Verify there is slop enough that everything can get aligned without binding or stressing any one point.
* Try not to let the end of the tube sit when epoxy can pool at the bottom of the hole. You can pull the insert up a bit and fix in place using tap so that the end of the pole doesn't sit at the very bottom.
* Prepare to epoxy. If you're going to stain or leave the wood natural, you'll want to run a collar of tape up around the hole in the handle. Epoxy will seep into the pores of the wood and no amount of sanding will erase it away. You WILL see it. If you're painting the handle then no worries. If any epoxy drips, cut it clear with a utility knife, and sand smooth.
* I prefer the mixing tip epoxy applicators because I don't have to fool around with set times and mixing ratios. Plus it acts like it's own applicator paddle. (Use the mixing tip to smear the epoxy around to coat the pipe.
* As tempting as it may be, don't hammer the insert into place.
* When inserting, take your time to twist and wobble the insert into place. Otherwise you'll leave half your epoxy around the neck of the opening
* Finally we need to true up the pole and tape in place so that everything stays true till the epoxy sets. This epoxy will harden in less than half an hour, but'll take almost a full day to cure to full strength. Try to let it sit at least 6 hours before moving it, and 12 hours before removing the brace.
* The easiest way to ensure true is to use shims. Slide a shim between the brace and the pole way down near where you epoxied. The shim should just barely touch both the brace and the pole. Mark the shim at that location then slide the shim all the way up to the top. The gap between the brace and the pole will be the same at the top and bottom this way. Tape in place and then make sure that the pole is in the center of the brace. Everything should be square enough then.
Step 9: Paint Base Coat
Cool thing is at this point your shovelflag is functional. Just assemble the rest of the flag kit together per the instructions and away you go. From here on out we're just working on cosmetics. This is usually also the spot I stop at when making blanks as well.
* Remove any and all epoxy residue. It has a habit of getting everywhere with me, so I run my hand over all the wood making sure I didn't leave any rough spots or epoxy streamers.
* Completely cover the blade of the shovel with a plastic bag & masking tape
* Spray whatever color you want the letters to be onto the shovel. Take your time. Don't try to paint the entire shovel to depth in one coat, it'll run and look like poo. Use enough so that the entire surface just looks wet, for the first coat don't worry if you can still see some wood poking through. Spray paint works best if you stay at least 3" from the peice, any closer and you run the real risk of runs.
* Wait for everything to get mostly dry, and recoat.
* Let completely dry (>3 hours) and then go over wherever there will be lettering or designs with 00 steel wool.
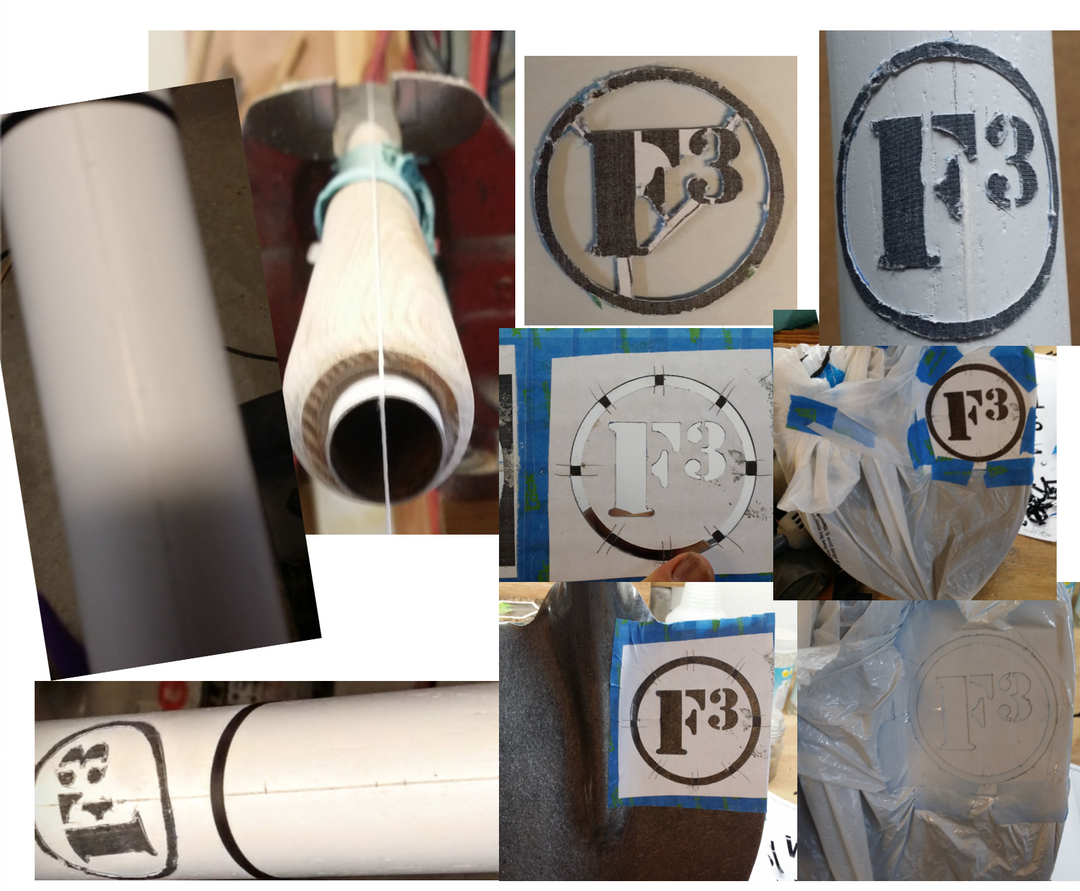
Step 10: Lettering & Overlays
Step 11: Cover Paint
Before we move on: You made sure overpaint all lettering & overlays with the base color, aye? If not, go do it now. I'm serious, it'll look MUCH better and prevent 95% of the bleed through and make every thing nice and crisp and pretty.
* Ok, if everything's dry start going over the whole handle with your top color. Remember: Work in light, but complete coats. Resist the urge to get the spraycan close to the handle, you'll make runs.
* Before the final coat of spray, go over the entire handle with 00 wool. We're trying to knock down anything that may have settled onto the handle while drying or other imperfections.
* Lay on that last beautiful coat of paint.
Just as a benchmark, it usually takes me ~4 hours to get 3-4 coats of spray paint onto a project peice. Take your time and let things dry, we're in no rush here.
Step 12: FINISH
Remember to STIR finishes. Never shake as shaking puts small bubbles into the finish.
Get the ends first, but apply the bulk in the middle and brush it out. The last stroke should go from one end all the way to the other end. It should drag evenly, but not grab. If the brush grabs, then there isn't enough finish to float. You want a good float without too much product as this will reduce brush strokes.
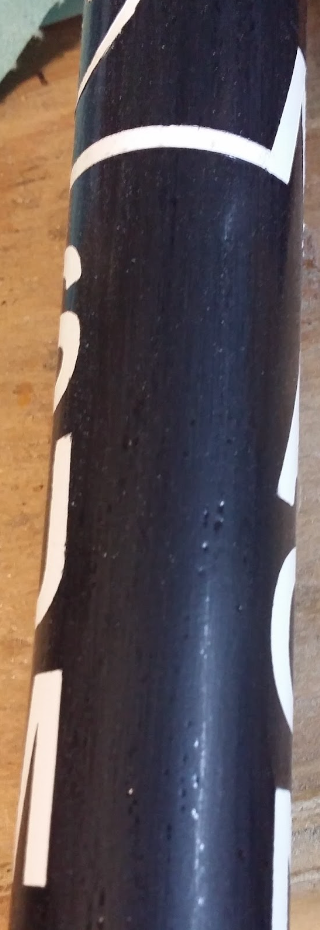
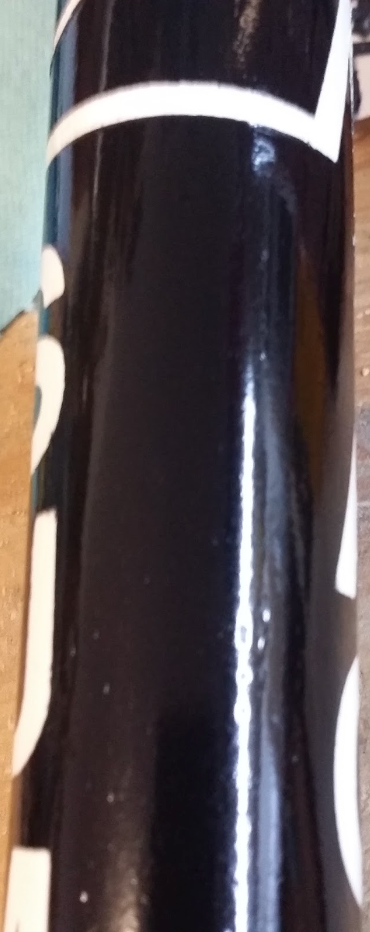
Whether you spray or brush, let dry and then go over everything with either 3-0 or 4-0 steel wool. Not hard, you don't want to remove the last coat or go down into the paint. Many of these finishes dry really smooth and that makes it difficult for the next coat to adhere. We just want to scuff the previous coat up so that the new coat has a place to get its toes in. It'll look just a bit matte, don't worry. After scuffing, take a dry clean tack-cloth (aka, an old t-shirt a 2.0 has grown out of) and wipe it down to remove any dust.
On the left is fresh, on the right is scuffed with steel wool.
Finishing takes time. More time than painting. The number of coats needed varies from type to type. Rule of thumb is if it dries quick (spray poly) it'll be thin and need more coats. Brushed Poly & Shellac will need 3-4 coats, polycrylic will need 3, and spray poly will need 5-6.
Let dry for 3-7 days. That's right, *Days*. That finish needs time to fully harden.
Don't be tempted to put it out in the sun to dry. I GUARANTEE you it'll bubble. The sun will heat up the finish making it tacky again, and then the air still in the wood and moisture evaporating will raise bubbles in the finish like it was blowing bubbles in Juicy Fruit. Don't ask I know this.
Step 13: Apply an F3 Sticker to the blade and you're done!